|
Using Microsoft Outlook it's possible to create
a history, present day and future for your characters. By creating
an additional working file (called a PST file) within the Outlook
program you're able to keep track of characters, contacts, ideas,
timelines and plots.
The standard Outlook files - contacts, calendar,
notes, journal, tasks, and mail - can be renamed and altered to
suit an author's needs. Here is a list of the types that I have
used in the past:
 |
Characters (contacts) |
|
Chapters (mail) |
|
Timeline (journal) |
|
Book Notes (notes) |
|
Calendar |
|
Tasks |
I won't go in to the the detail of all the
individual items, most of them should be obvious, but I will describe
how I change and use them.
|
If not already open, open the folders view
(toolbar-view-folders list) |
|
From the toolbar select - File - New - Personal
Folders File |
|
Select a suitable place on the PC to store
it, somewhere that you'll be able to back it up from |
|
Give it a name, I'll assume that you will
use the book title |
|
You should notice that the book title appears
in the folder list |
|
Right mouse click on the Outlook shortcut
bar and select Add New Group. Give the group a suitable name. |
|
Click on the newly created group and you
will be presented with a blank bar. |
 Click to see example
Characters
This is the standard contacts file. It is possible to create
more than one contacts file and rename them as required.
|
In the folder list right click on the book
title, select New Folder |
|
Name the folder heroes (or villains), and
change the Folder Contains type to Contact Items |
|
Make sure that the book title is selected
and click OK |
|
The heroes folder should appear in the Folder
List |
|
Right click on the heroes and select Add
To Outlook Bar |
|
Repeat for Villains and any other variants. |
To create a hero character, say the main character
of the story, select the heroes icon from the Outlook bar, select
New on the toolbar.
Fill in the relevant information for you character, you can use
the standard fields or change the form to suit you (it's a little
complicated to explain how to do that here but the help file will
give you full instructions).
If you want to use the standard fields you will
need to ensure that you use the same category fields for each character
created. That way you'll be able to search and cross reference the
characters.
 Click to see example
In the example I've used 'Job Title' as the character
type (mother, father, murderer, etc.), 'Company' as the relationship
in the story, and the notes section as a character description.
I've also altered the 'Categories' to include Hero and Villain,
you can add as many as you like and delete the ones you don't need.
|
|

Office
Outlook 2003

Outlook
2003 Inside Out
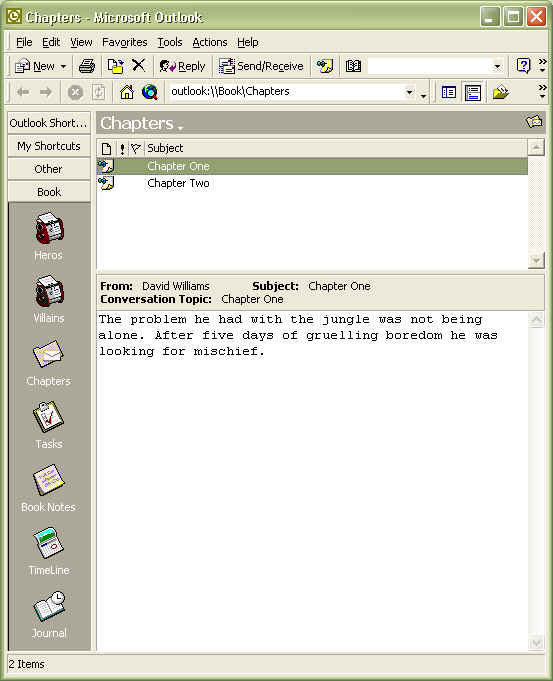
Chapters
It's possible to modify Outlook's mail folder to hold individual
chapters.
When creating a chapter you don't actually create
a mail message, you will 'post' a message to the folder.
|
In the folder list right click on the book
title, select New Folder. |
|
Name the folder Chapters and make sure the
Folder Contains type is Mail Items. |
|
Make sure that the book title is selected
and click OK |
|
The Chapters folder should appear in the
Folder List |
|
Right click on Chapters and select Add To
Outlook Bar |
|
Click Tools on the menu bar and then select
Customize..., this will display a customize tool box. In the
left hand pane select File, in the right hand pane select
Post in This Folder. Drag the post icon to the toolbar. Close
the Customize box. |
|
To create a new chapter, select the post
icon. Give it name and start creating. |
|
When you're ready click the Post icon. |
|